How To Use Momcozy S9 Pro
If you’re new to the Momcozy S9 Pro and have a few questions on how to use it to its full capacity, then you’re in the right place!
In this how to use Momcozy S9 Pro guide, I am going to walk you through every step of using the Momcozy S9 Pro, so you can use your S9 Pro pump with confidence.
I think the Momcozy S9 Pro is a great budget friendly, wearable breast pump. It comes with user-friendly features and extended battery life, all designed to make your breastfeeding journey smoother and more convenient.
So, whether you’re new to Momcozy wearable breast pumps or a long-time user that is looking to improve your pumping experience with tips and tricks, this guide on how to use Momcozy wearable pump is your key to unlocking a stress-free and successful pumping experience with the Momcozy S9 Pro.
And if you are still contemplating purchasing the Momcozy S9 Pro, then make sure to check out my full Momcozy S9 Pro Review!
Momcozy S9 Pro Inclusions
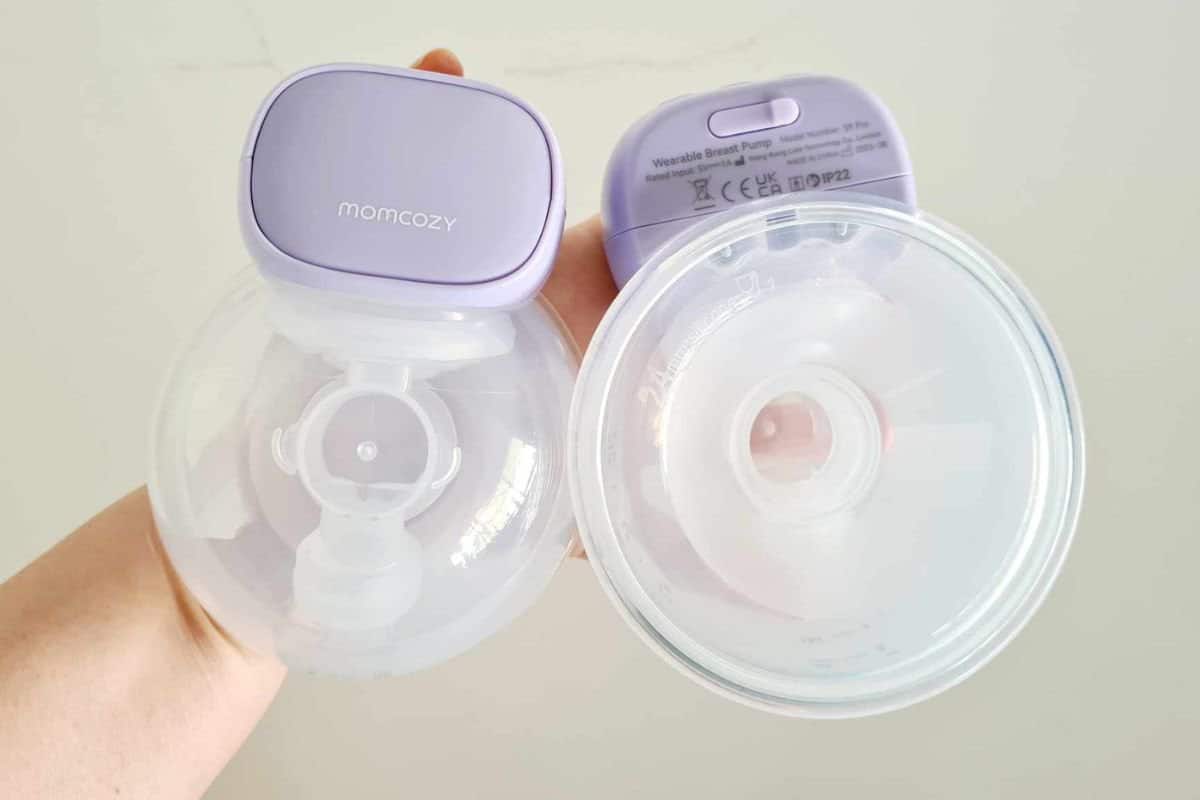
When you first receive your Momcozy S9 Pro breast pump, it’s essential to familiarize yourself with the contents of the package.
This will ensure that you have all the necessary components to set up and start using your breast pump effectively.
When you purchase a Momcozy S9 Pro pump, included in your kit is:
Single Wearable Pump Kit
Pump Motor * 1
Milk Collector (180ml) * 1
Silicone Flange (24 mm) * 1
Silicone Diaphragm * 1
Duckbill Valve * 2
Linker * 1
Bra Adjustment Buckle * 1
USB Cable * 1
Storage Bag * 1
Double Wearable Pump Kit
Pump Motor * 2
Milk Collector (180ml) * 2
Silicone Flange (24 mm) * 2
Silicone Diaphragm * 2
Duckbill Valve * 4
Linker * 2
Bra Adjustment Buckle * 2
USB Cable * 2
Storage Bag * 2
I highly recommend taking a moment to check all these components are included in your package. If anything is missing or damaged, contact Momcozy’s customer support for assistance.
If you have are using a second-hand pump, then you will need to check that all the necessary parts are there. I’d also consider replacing parts such as the valves and breast shields as per Momcozy’s maintenance guidelines.
While replacing valve membranes, duck valves, and breast shields may incur an additional cost, it is crucial to uphold the hygiene and efficiency of your pump during each pumping session.
Also, you will need to ensure that you have the correct flange size for your nipple size. This may need to be purchased separately.
Components
Before you start using the Momcozy S9 Pro breast pump, it’s essential to have a clear understanding of its components and controls.
Here’s an in-depth overview:
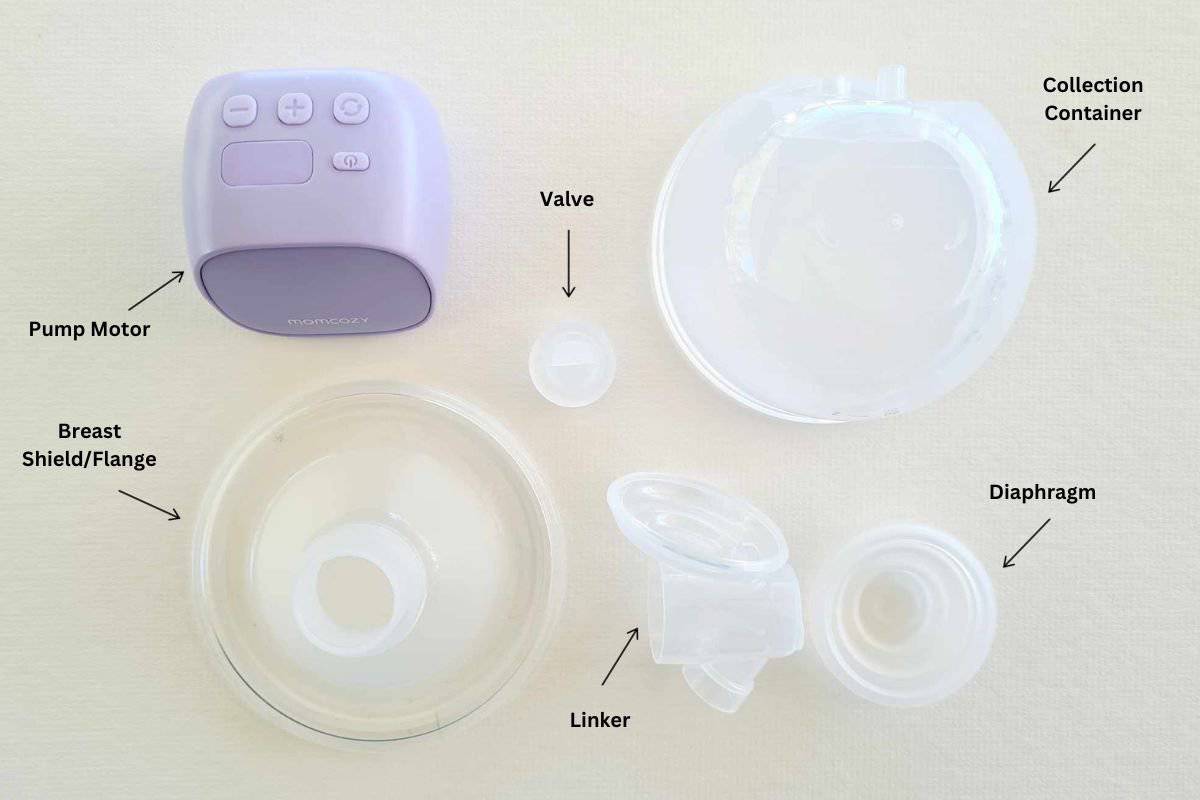
Breast Pump Motor: The main unit of the Momcozy S9 Pro contains the motor and power source. It’s the heart of the pump, responsible for creating the suction necessary for milk expression.
Milk Collection Cup: These are the containers that collect the expressed breast milk.
Breast Shield/Flange: A breast shield, also known as a flange, is the funnel-shaped part that fits over your breasts. They come in various sizes to accommodate different breast shapes. Properly fitting breast shields is crucial for comfort and efficient milk expression.
There are also different flange sizes available that insert into the breast shield to change the sizing.
Diaphragm: This is a small flat, circular membrane which is part of the valve system.
Linker: This connects the diaphragm, valve, and flange together.
Valve: This component helps create a one-way valve system that controls the flow of milk from your breast into the collection bottle.
USB Cable: The USB charger is pluged into your pump motor and power source to recharge your breast pump.
Power Button: The power button is used to turn the breast pump on and off.
LCD Screen: The LCD screen displays important information, such as suction level, pumping mode, and battery status.
Suction and Mode Control Buttons: These buttons allow you to adjust the mode and suction level according to your comfort and milk flow.
Assembly
Assembling the Momcozy S9 Pro breast pump correctly is crucial for its efficient operation.
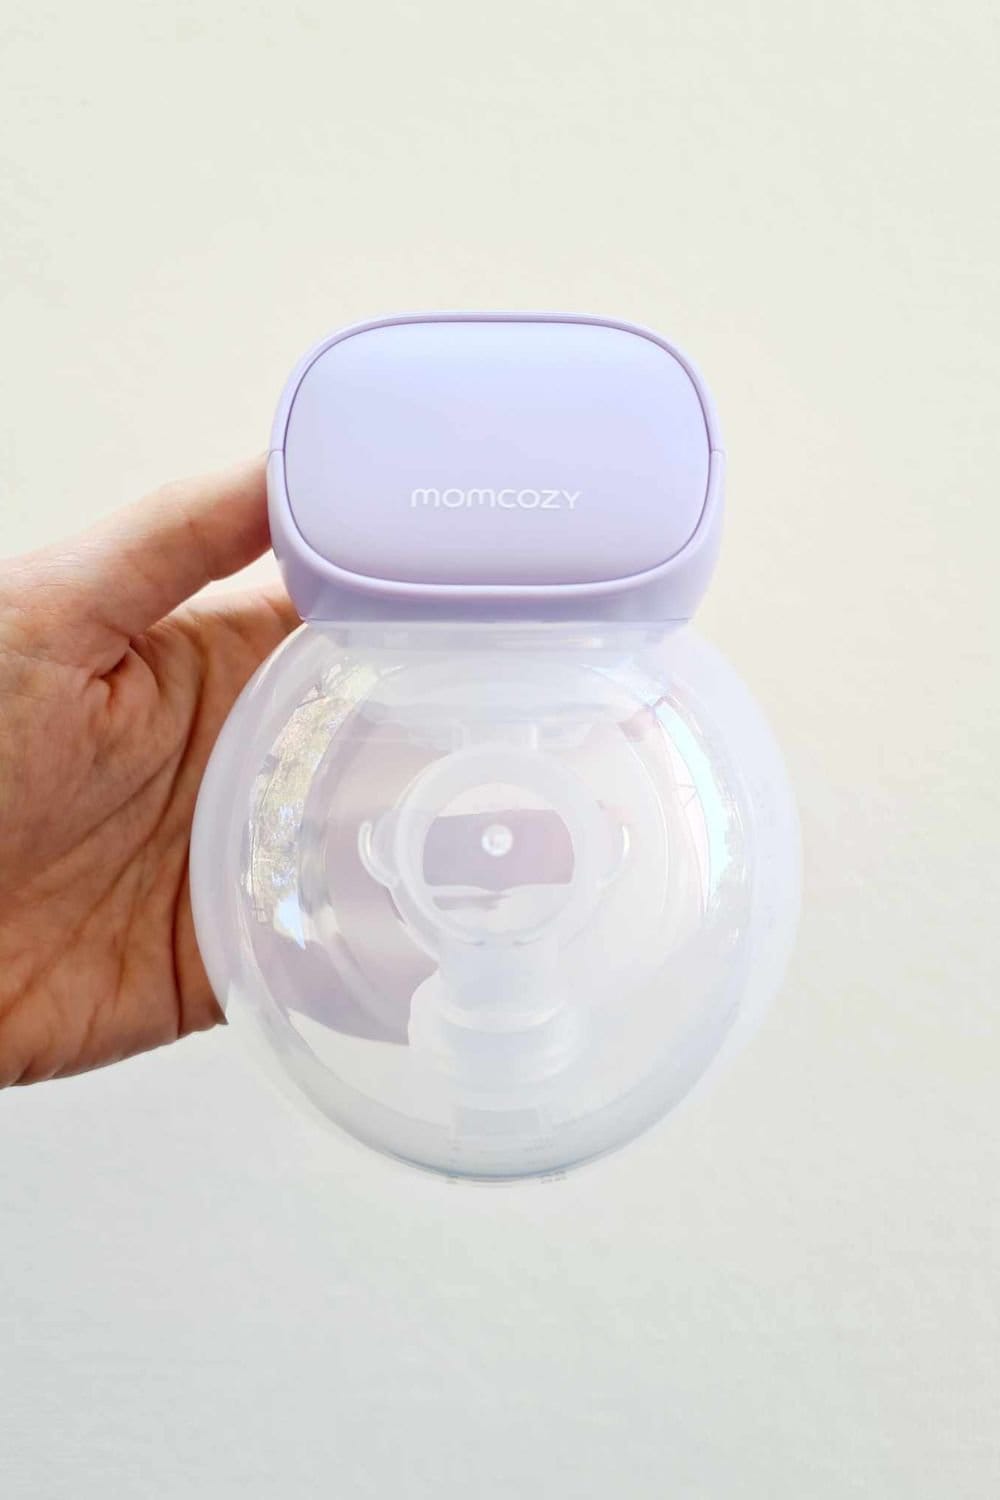
When you purchase your pump, it will come in already assembled in the box. I think this is great as you can see how it is all meant to go together.
However, you will need to dissemble the pump and sterilize prior to use.
Maintaining proper hygiene during the setup of your Momcozy S9 Pro breast pump is essential to ensure the safety of your breast milk and your overall health.
Here are some hygiene tips to follow:
- Wash your hands thoroughly before touching any pump components.
- Disassemble the pump parts that come into contact with your breast milk (breast shields, valves, membranes, and collection bottles) after each use and wash them with warm, soapy water. Rinse and air dry or use a clean, dry cloth or paper towel.
- Sterilize these components regularly, especially if you are using the breast pump multiple times a day. You can do this by boiling them for a few minutes or using a steam sterilizer.
- Ensure that the breast pump unit and tubing remain dry and free from moisture or milk residue.
- Store your breast pump and its components in a clean, dry place when not in use to prevent contamination.
Now once your breast pump has been cleaned and sterilized you can look to reassemble it ready for your first pumping session.
Here’s a step-by-step guide to help you reassemble your S9 Pro:
Step 1
Wash your hands thoroughly with soap and water before handling any components.
Step 2
Put the silicone diaphragm into the linker. You will want to ensure that there is a good seal.

Step 3
Connect the silicone valve to the end of the linker, again making sure a sufficient seal.
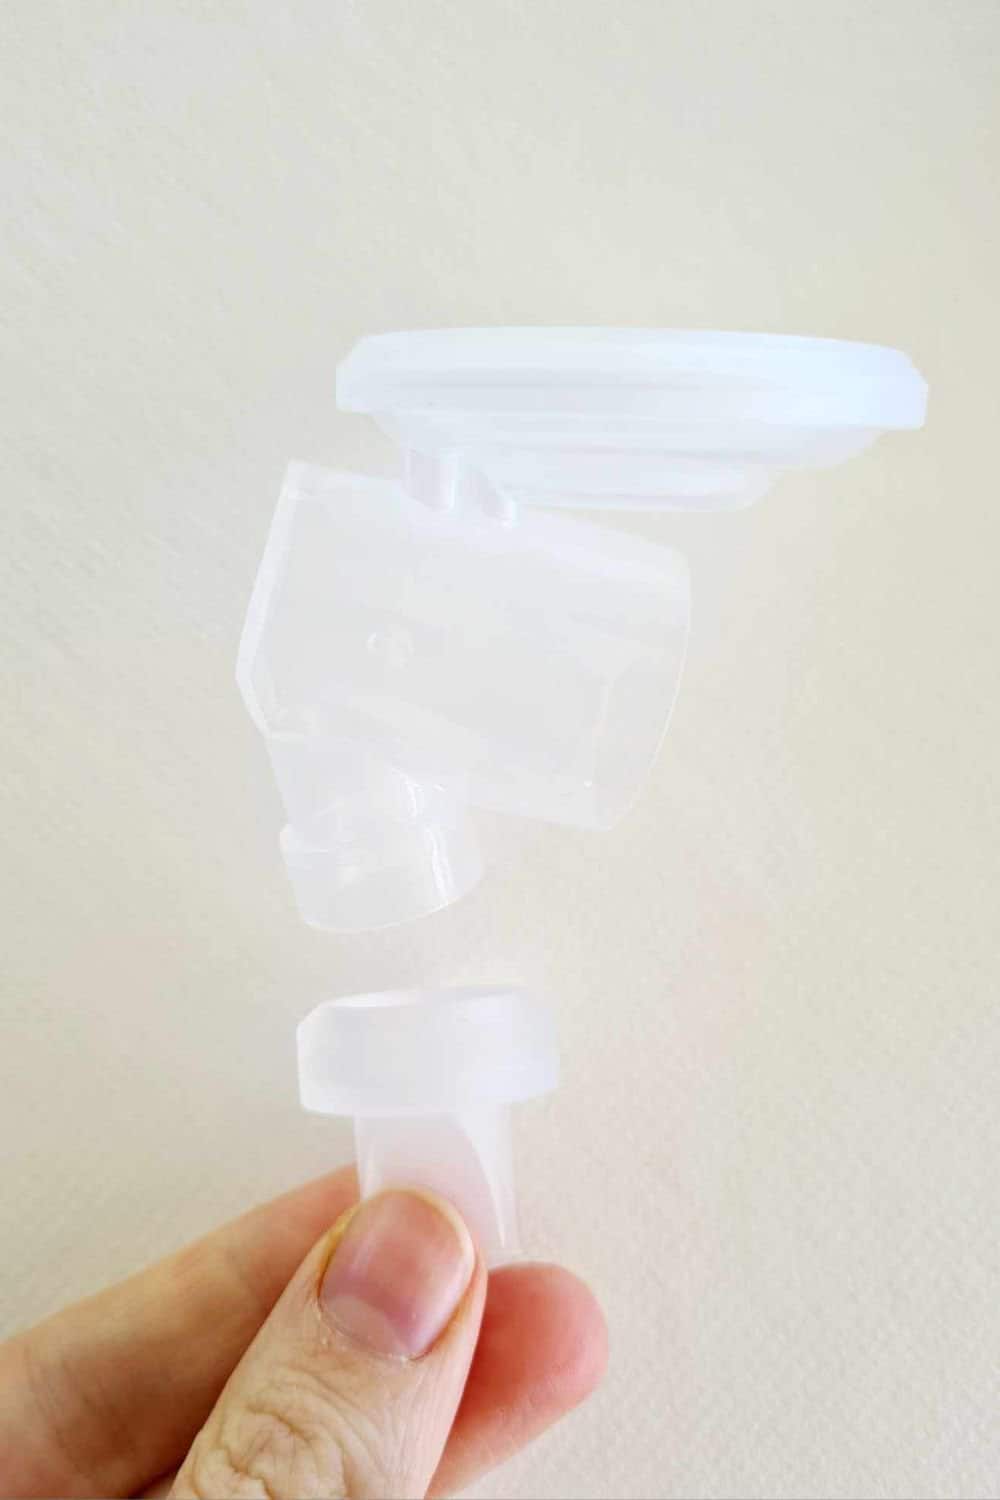
Step 4
Attach the assembled linker part to the milk collector cup and align the ‘ear’ notch of the linker with the inner groove of the milk collector cup. Ensure a secure fit.
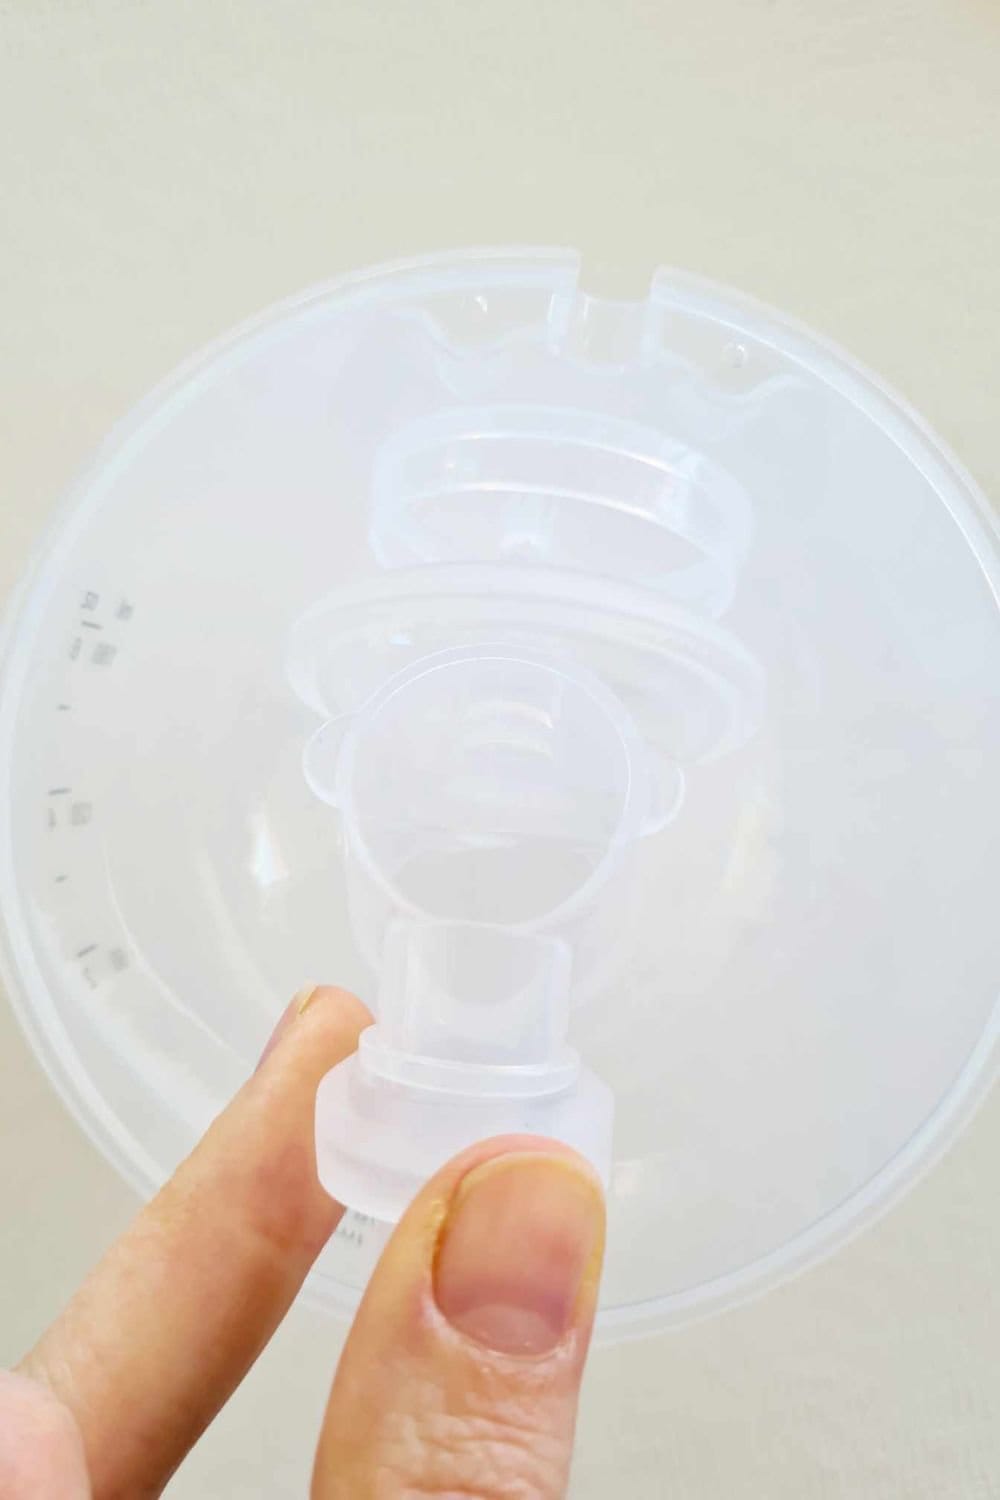
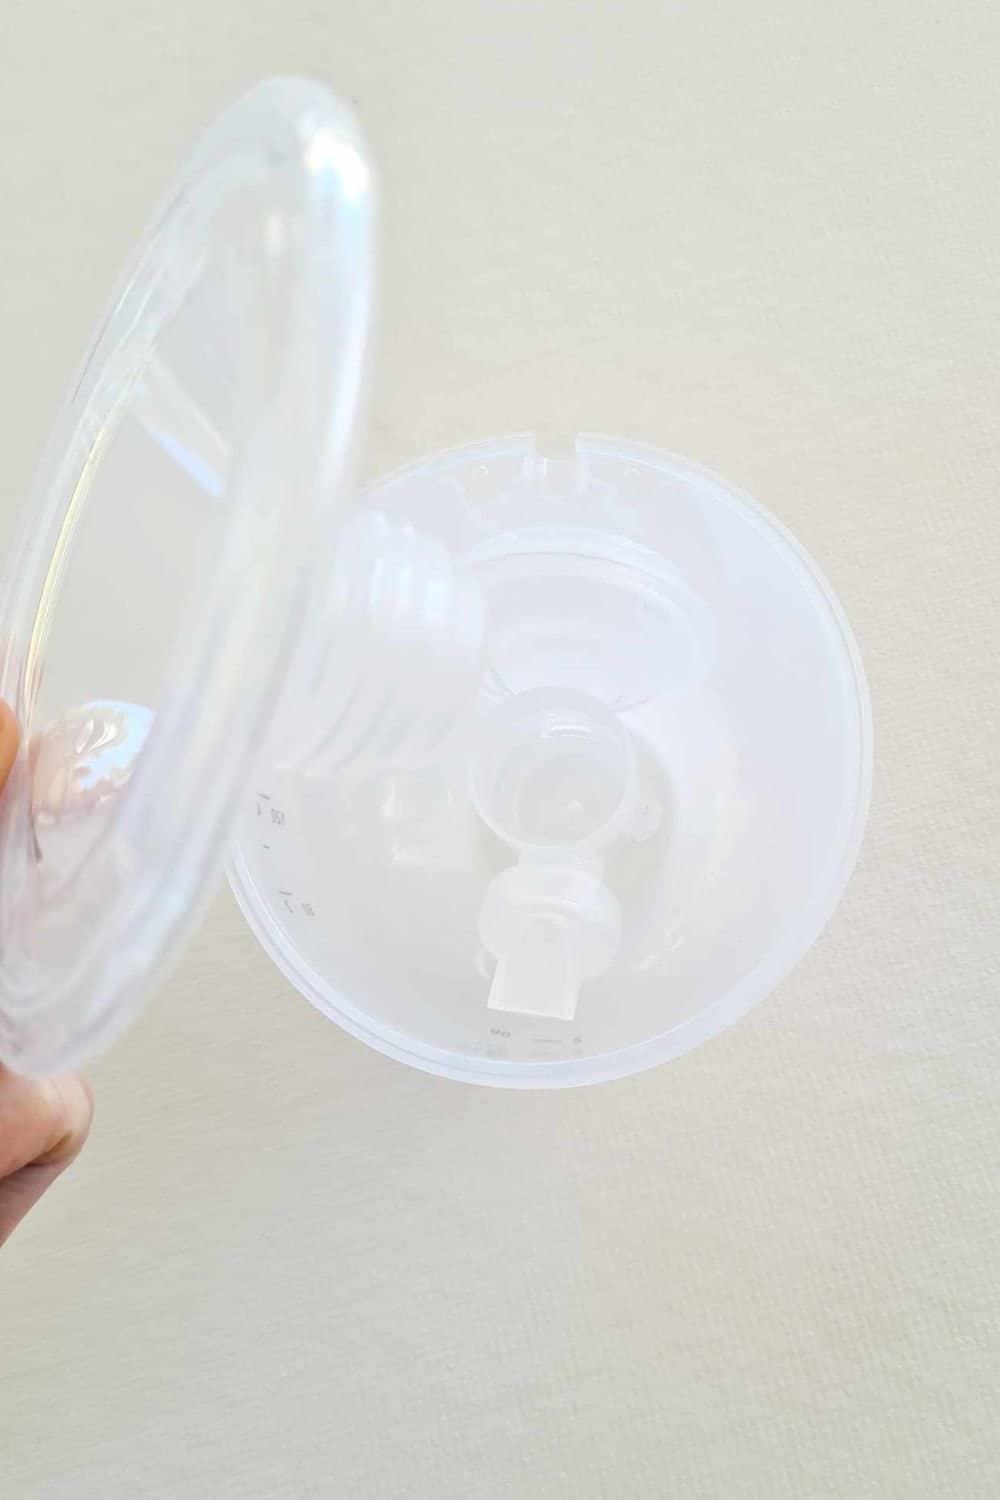
Step 5
Connect the flange/breast shield with the main body of the collection cup. I like to ensure a good seal by pressing my thumbs around the rim.
Step 6
Press in the pump motor to the top of the collection container.
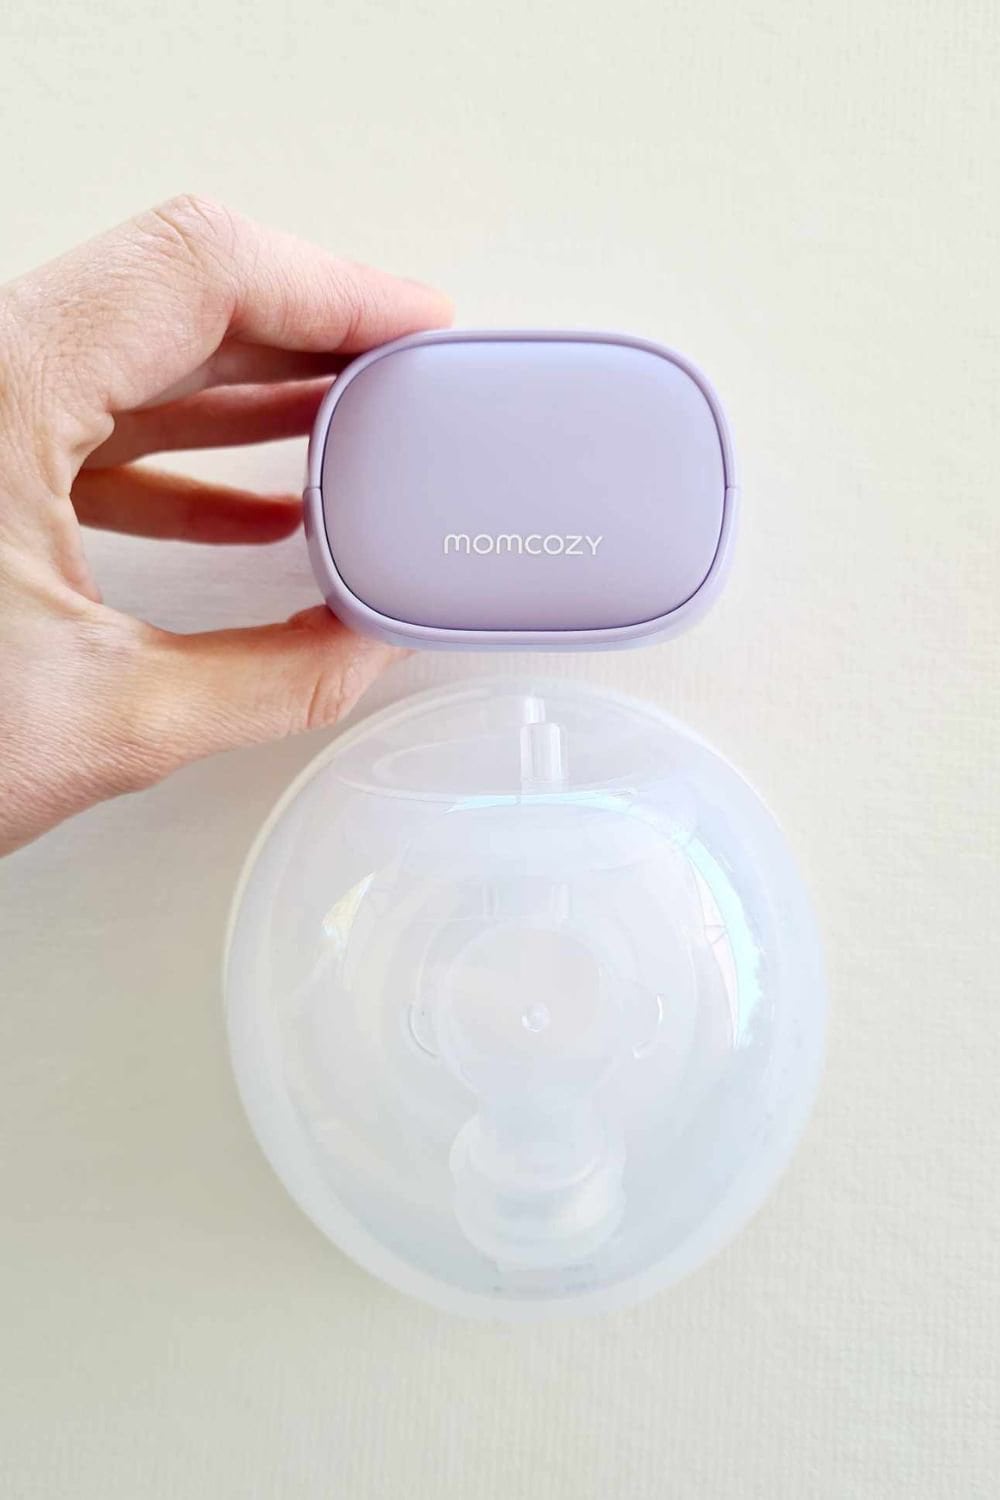
Step 7
Turn on the Momcozy S9 Pro breast pump by pressing the power button. You will see the LCD screen light up.
Now, your breast pump is ready for pumping breastmilk, but first make sure to familiarize yourself with the pump’s controls, including the suction level and mode settings.
Buttons and LED Screen
There are 4 buttons used to operate the Momcozy S9 Pro, with an LED screen that provides valuable information during your pumping sessions.
Here’s what you need to know about how to use Momcozy pump settings for your S9 breast pump:
On/Off Button: You can turn your pump on and off or pause it with the power symbol button.
To turn your pump on or off, long press the power button.
Short press the power button to pause. You can then press any button to un-pause and continue your pumping session.
Suction Level: The screen displays the current suction level. You can typically increase or decrease this level to find the right intensity for your comfort and milk expression.
The + button will increase the suction level and the – button will decrease it.
The level you are on will be displayed by a number on the screen.
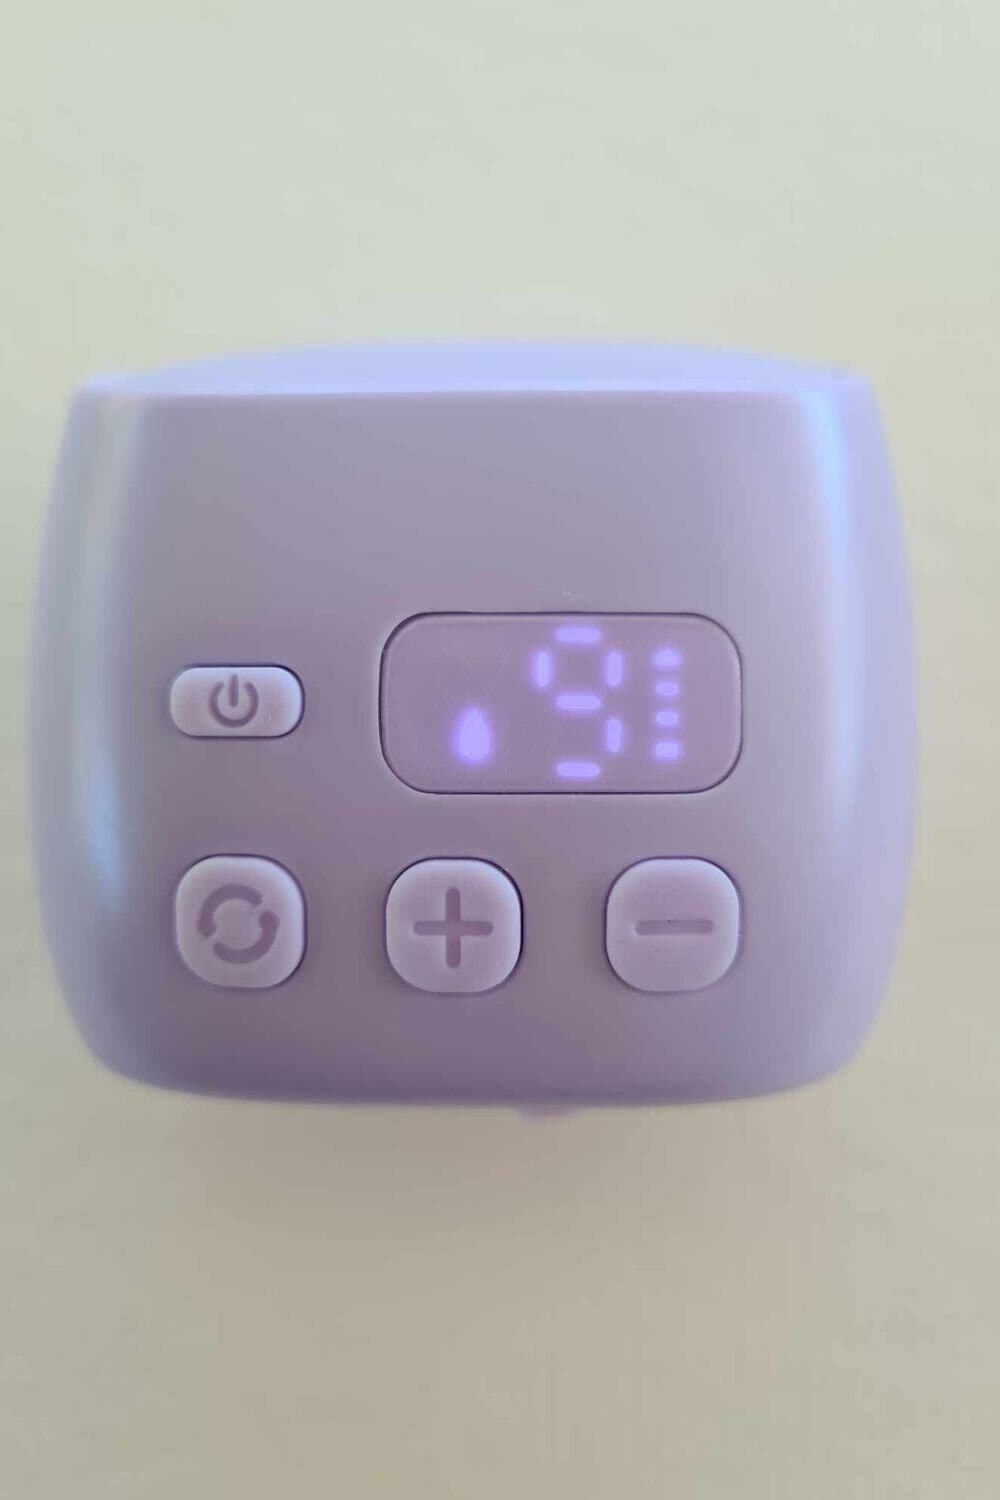
Pumping Mode: There are two pumping modes on the S9 Pro, stimulation mode for stimulating letdown and expression mode for efficient milk removal. The LCD screen will indicate the current mode.
The heart symbol represents the stimulation mode and the droplet symbol represents the expression mode.
You can switch between the two modes with the circular arrow button.
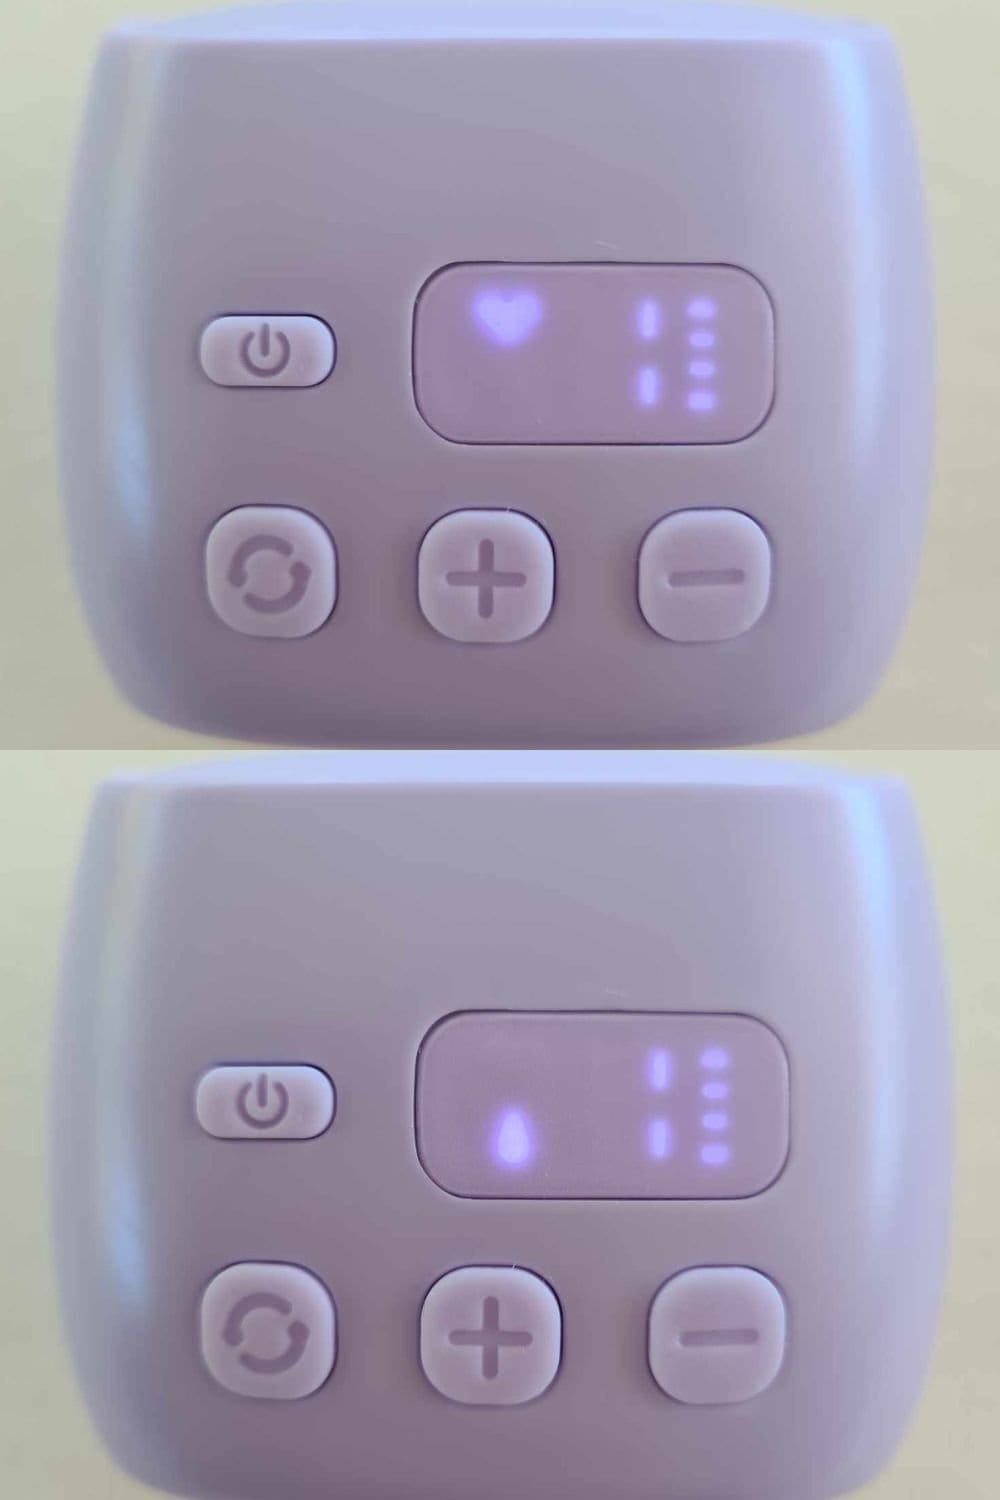
Battery Status: If your breast pump is battery-powered or has a rechargeable battery, the screen will display the remaining battery life. This is the stacked bars symbol with 4 bars solid white representing a full battery.
Error Messages: The LCD screen may display error messages if there are any issues with the pump, such as a blocked tube or low battery.
Suction Levels and Modes
The Momcozy S9 Pro comes with 2 modes and 9 different suction levels.
The two pumping modes are stimulation mode for initial breastmilk stimulation and expression mode for milk removal.
The stimulation mode usually has a faster rhythm to encourage letdown at the start of your pumping session, while the expression mode operates with a slower, more consistent suction pattern during the main part of your pumping session.
During both the stimulation and expression modes you are able to adjust the suction strength with the 9 different suction levels, from gentle to strong.
I highly recommend experimenting with different levels to find what feels comfortable and effective for you. Start with a lower suction level and gradually increase it until you find the right balance.
Just keep in mind that the strongest setting may not be the most beneficial for milk extraction as it is also strongly connected to your comfort levels.
Using the Momcozy S9 Pro
Once you’re ready to start pumping with the Momcozy S9 Pro, it is a relatively straightforward process.
Here are the key steps to follow when using the Momcozy S9 Pro:
Step 1
Wash Your Hands: Clean your hands thoroughly with soap and water to maintain hygiene.
Step 2
Assemble the Pump: Ensure that you have sterilized and assembled your pump ready for use.
Step 3
Place the Breast Shields: Position the breast shields over your breasts, ensuring that your nipple is centered and can move freely within the shield. Create a gentle seal by pressing the shield slightly against your breast.
Step 4
Secure your Pumping Bra: One of the main benefits of the S9 Pro is that it is a wearable pump, therefore it can fit snugly into your bra without any cords. So, once you have a secure fit over your nipple, ensure that your bra is also secured. You’ll want to make sure that the bra you use is stretchy and your pump fits in it nicely. Not too loose and not too tight.
Step 5
Turn On the Pump: Press the power button on the Momcozy S9 Pro to turn it on. The LCD screen will light up, and you’ll be able to see the current settings.
Step 6
Select Pumping Mode and Adjust Suction Level: Choose the pumping mode that suits your needs.
Start with the massage mode to stimulate letdown.
You can also adjust your suction level on the massage mode. I recommend starting with a level 2 or 3 on massage mode for around 2 minutes and then once your milk starts flowing, switch to the expression mode for efficient milk removal.
On the expression mode, I recommend beginning with a low suction level and gradually increasing it until you find a comfortable yet effective setting.
You should feel a gentle pulling sensation, not pain.
Your expression mode should for around 15 to 20 minutes.
Step 7
Monitor: During your session it is vital to keep an eye on your milk flow. This will allow you to trouble shoot any issue that arises such as your nipple shield moving or low suction power.
Step 8
Turn off the Pump: Once you have finished with your milk extraction turn off the pump by pressing on the power button. If you forget to turn off the pump, it does have a 30 minute auto shut off.
Step 9
Remove the Pump: Use your fingers to break the seal between the flange and your breast. Lean slightly forward when removing your pump to prevent any spillage.
Step 10
Pour the Breast Milk into A Storage Container: You will not be able to store your milk in the collection cups, thus you will need to transfer the milk into a suitable storage container. I do love that Momcozy S9 Pro comes with a handy pouring spout to make this easier.
Step 11
Clean Your Pump: Once finished with your pumping session you will need to wash all the parts that have come into contact with your breast milk to ensure the hygiene of your pump.
Step 12
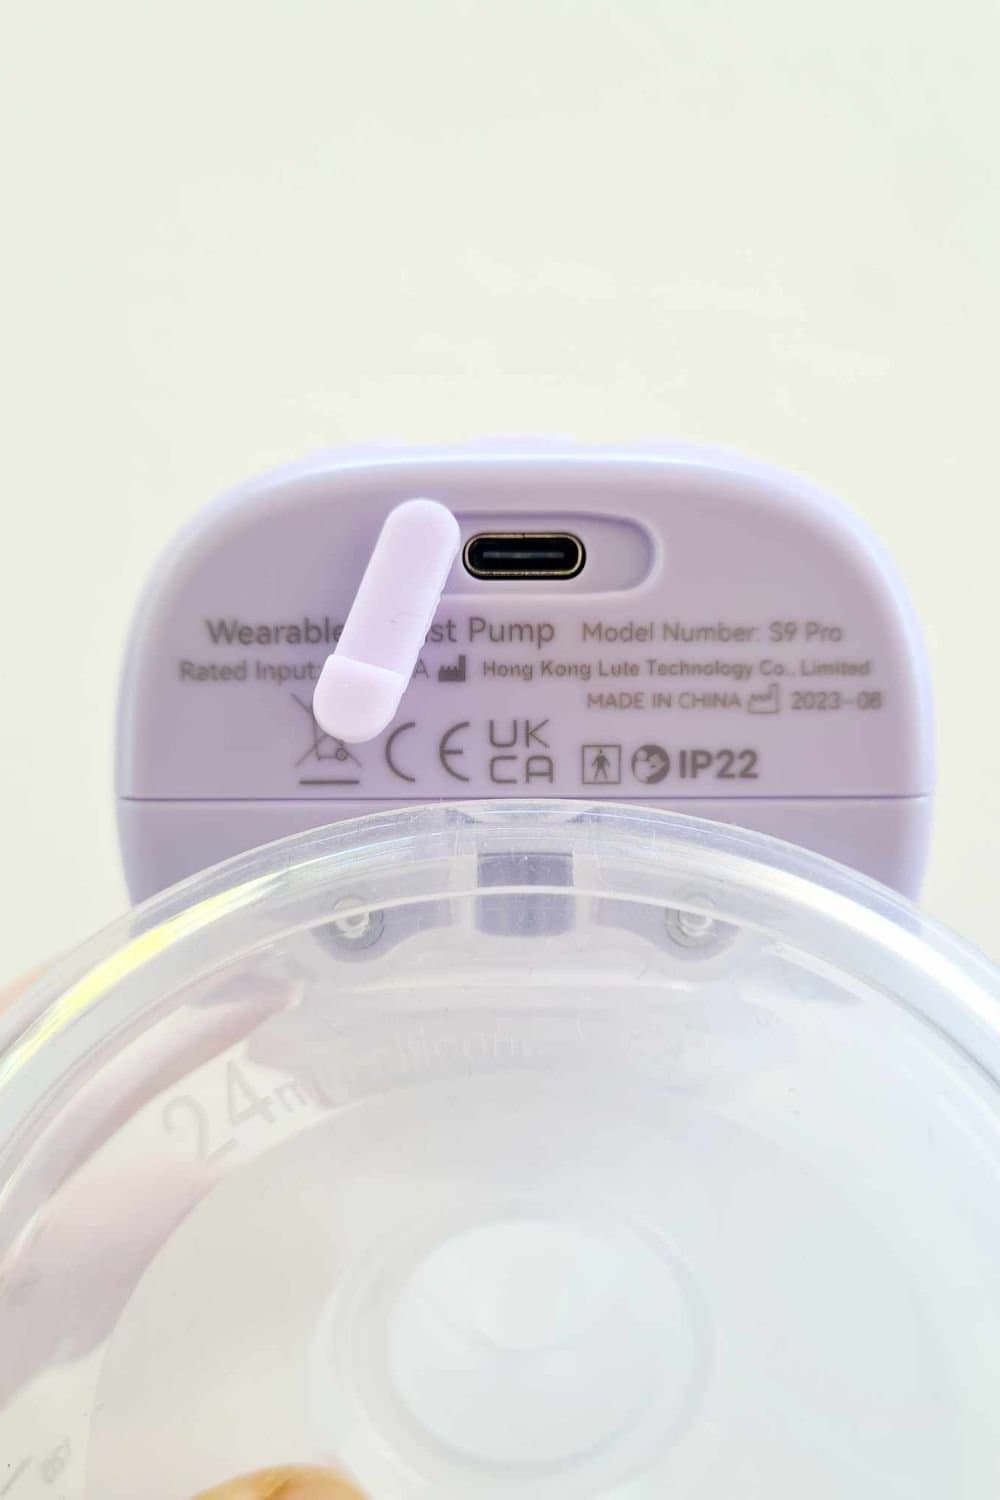
Check the Battery Levels: After you’ve finished your session, I highly recommend checking the remaining battery life on the pump. Recharge the pumps if needed so they are ready for your next use. The charging port is located at the back of the pump motor.
Step 13
Store: Once clean, store your pump in a safe and secure location ready for the next use.
Troubleshooting Common Issues
While the Momcozy S9 Pro is a reliable breast pump, you may occasionally encounter common issues that can disrupt their pumping experience.
Here are some solutions and troubleshooting tips for addressing these common problems with the Momcozy S9 Pro.
Low Milk Output
- Ensure you’re using the correct breast shield size for your nipple.
- Adjust the suction level and mode to your comfort and milk flow.
- Try breast compressions or massage during pumping to stimulate milk flow.
- Stay hydrated, maintain a balanced diet, and get enough rest to support milk production.
Pain or Discomfort
- Check the breast shield fit; it should not be too tight or too loose.
- Reduce the suction level if it’s causing pain.
- Apply a lanolin-based nipple cream or use a warm compress before pumping.
- Ensure proper breast positioning to avoid nipple rubbing against the shield.
Loss of Suction
- Check that all pump components, including valves and membranes, are properly assembled and sealed.
- Inspect the tubing for any kinks or blockages.
- Replace worn-out or damaged parts like valves and membranes.
- Ensure the breast shields are securely attached to your breasts.
Milk Overflow
- Monitor milk flow during pumping and switch off the pump when the collection cups reach 4oz.
- Keep the pump level to prevent milk from overflowing.
Noise or Vibration
- Ensure that all components are securely assembled and in good condition.
- Place the breast pump on a stable and flat surface to minimize vibrations.
- Contact Momcozy customer support if the noise or vibration is excessive, as it may indicate a malfunction.
While many issues can be resolved through troubleshooting, sometimes you may need further assistance. In that case, I recommend reading through the Momcozy S9 Pro manual and if that doesn’t help contacting Momcozy’s customer support to assist you with any issues you may encounter while using the Momcozy S9 Pro breast pump.
They can provide expert advice, troubleshooting assistance, and information on warranty coverage and replacement parts to ensure you have a seamless pumping experience.
You can contact Momcozy support at support@momcozy.com
Watch The Video
Prefer to watch my how to use Momcozy S9 Pro video? Then check out my Momcozy S9 Pro assembly and how to use video below!
Related Posts
Final Thoughts
The Momcozy S9 Pro is a great wearable breast pump designed to simplify your breastfeeding and pumping journey.
Yet, the key to success is knowing how to use the Momxozy S9 Pro for your optimum comfort and milk expression.
From understanding its components and controls to ensuring regular maintenance and hygiene, I hope this guide has provided you with a detailed step by step on using your Momcozy S9 Pro pump.
Just keep in mind that practice and patience are pivotal.
And don’t hesitate to seek support from lactation consultants, healthcare professionals, or Momcozy’s customer support team if you encounter challenges along the way.